Introduction
In this article I’m going to show how to create realistically looking rocky surfaces covered with sand in Unreal Engine 4. Most basic approach is to linearly interpolate two textures based on some designer defined value(i.e.. vertex painting). While the effect looks acceptable in some cases, there are situations where simple blending breaks the realism. One such situation will occur when trying to mix sand with gravel or rocks.
This tutorial will focus on creating material that will procedurally accumulate sand on surfaces based on their shape and slope. I assume you have basic knowledge of UE4 Material editor and 3D math. If you are here just for the content, download link is at the bottom of this page.
Disclaimer: Downloadable samples use assets from „Arid Desert Pack” package available on the Marketplace. If you didn’t buy this package, you will have to provide your own sand and gravel textures.
Mimicking sand behavior
In real world, dry sand behaves much like fluids behave. It „flows” under influence of gravity and it adapts it’s shape to the containing vessel. Therefore, sand will accumulate more on flat surfaces and less on slopes. In UE4 this effect can be easily achieved using material editor.
To create desired effect there are two main points to consider:
- detecting surface steepness,
- blending two materials based on heightmap texture.
The easiest way to detect in shader whether surface is flat or uneven is producing dot product between surface normal vector and constant vector [0 0 1]. As a result we will receive a [-1, 1] mask. The more flat surface is, the value will be closer to 1, while 90 degrees wall will produce value of 0.

Now that we have slope detection we need a way of controlling the acceptable angle below which, sand can accumulate. For example: accumulate sand for every surface inclined at an angle below 30 degrees. We could connect dot output to the if node and return 1 or 0 depending if input angle is higher or lower than specified threshold parameter. This will work, but there will be hard transition between sand and underlying surface – the result will look fake. Instead we will introduce something that I call smooth threshold. We should still be able to detect slopes but we also want to smooth out the transition.
Once we know which part of surface is flat enough to accumulate sand, we have to define how sand will accumulate in relation to underlying surface(gravel in this case) . Typically it will concentrate inside cracks or between rocks where they are least influenced by wind and rain. To simulate this we need to know how rocky surface is shaped. For our purpose, heightmaps provide this information. A heightmap is just a greyscale texture storing elevation data. The brighter pixel is, the higher altitude it represents.
Implementing soft threshold function
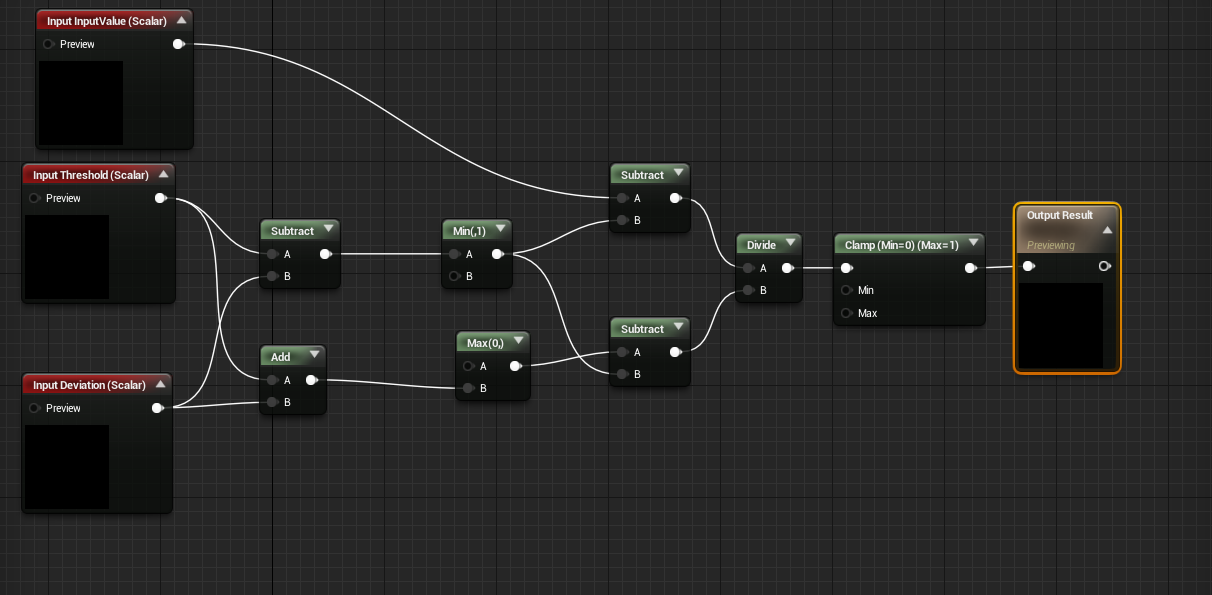
In the content browser create a new Material Function asset and name it MF_SoftThreshold and open it in the editor. Start with adding three function input nodes of scalar type with following names:
- Input value
- Threshold
- Deviation
Then implement following formula:
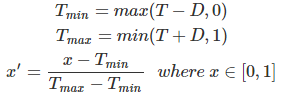
T is Threshold, D is Deviation and x is Input Value
Clamp the equation to [0,1] and connect it to the Output Result node. Save the asset and close material editor. The final network should look as follows.
Fun with sand
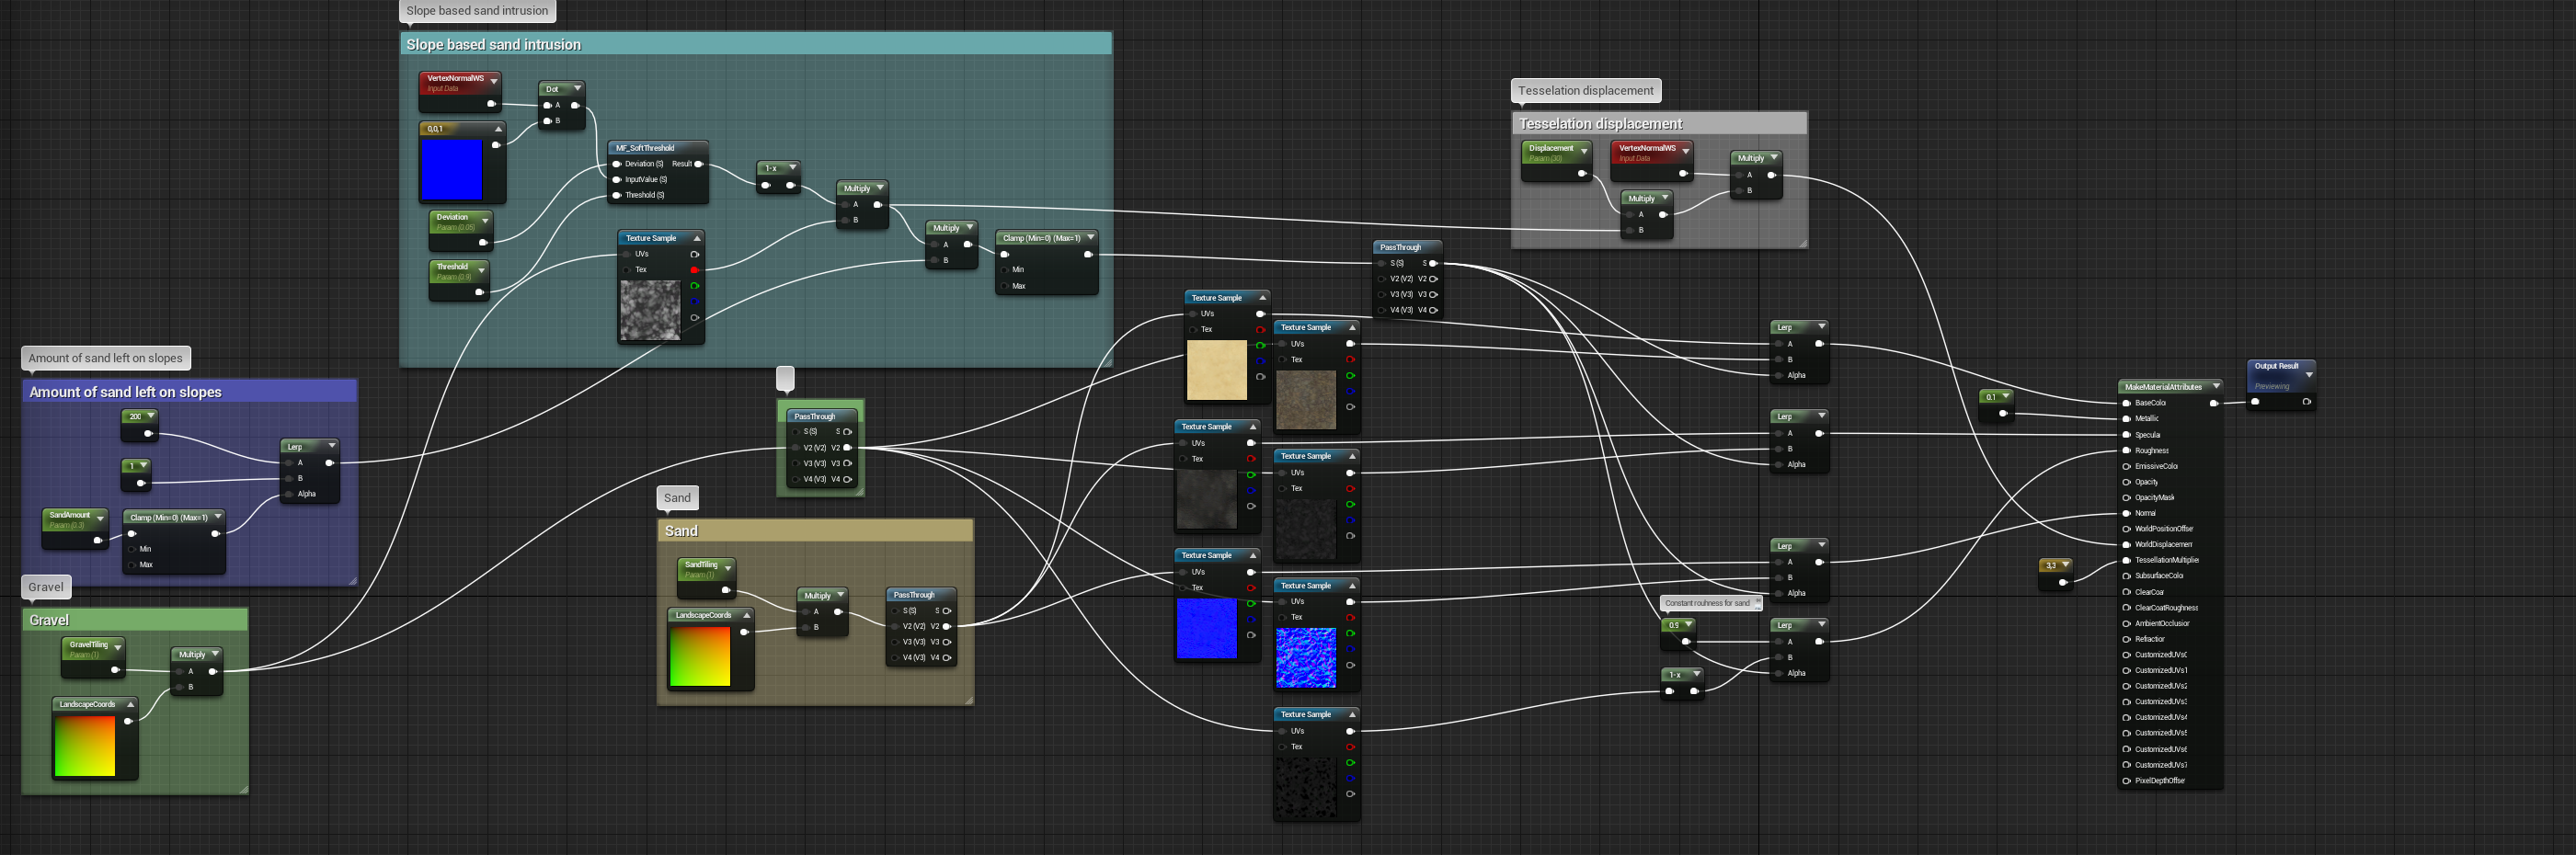
Now, in content browser create another material function and call it MF_RockSandBlend and change output value type to . This is where all the magic happens. Start with adding texture samplers for all relevant gravel and sand textures. In my case I have Diffuse, Normal and Specular maps for sand and Diffuse, Normal, Specular, Gloss and Height maps for gravel. Then, create texture coordinate nodes and plug them into each sampler. To give more control over texture tiling, let’s multiply texture coords with SandTiling and GravelTiling scalar parameters before connecting them to sampler UV inputs.
Now that we have our textures in place, let’s implement slope detection. Same as previously, start with computing dot product of VertexNormalWS and constant vector [0 0 1]. Add two more scalar parameters and name them Threshold and Deviation. Open content browser and drag your MF_SoftThreshold over to material editor. Connect parameters to corresponding function inputs and connect dot product output to Input value pin. The output value should be inverted so connect it to 1-x node.
We now have a proper mask dependent on how steep surface is. Let’s combine 1-x node with our gravel heightmap. After multiplying we get a modified mask telling us elevation of any given point on the surface. If it’s white, we have either slope or rock sticking above ground. If black – surface is even or it’s a crack between rocks. For user convenience we can provide a parameter that controls amount of sand on slopes. Create scalar parameter SandAmount, clamp it to [0, 1] values. Create lerp node and connect clamped parameter to the alpha pin. Create two scalar constants, assign values of 1 and 200 and conenct them to A and B pins. Connect lerp output to new multiply node. As second multiply input connect our slope-height mask and clamp the result to [0, 1].
We are almost there. Create 4 lerps and connect sand-gravel texture pairs for each channel: BaseColor, Specular, Normal, Roughness. For each alpha value, connect our mask. Create MakeMaterialAttributes and connect previous lerps to corresponding channels. Finally, connect your attributes to material function output. The final material network should look like this:
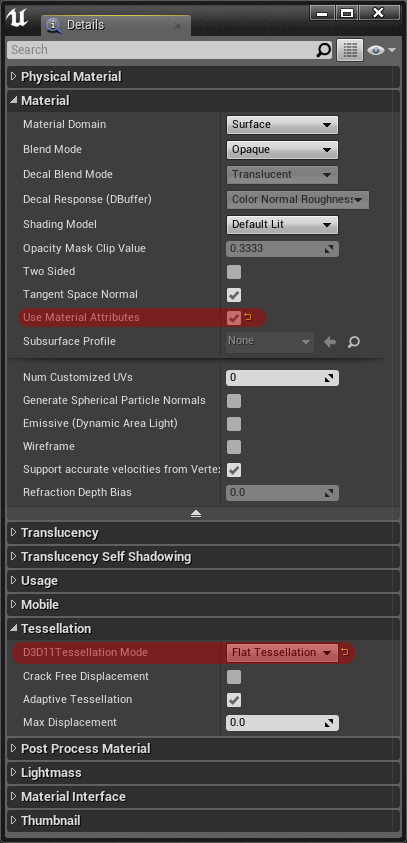
Our magicmaterial is in place, but to use it we have to create actual material. Let’s call it M_Landscape_Master. In it’s settings enable Material Attributes and set Tesselation to Flat. Create new MaterialFunctionCall node and set function to MF_RockSandBlend. Connect this node to material output. And That’s it.
Summary
This short tutorial presents a method to speed up level design with procedural materials. Instead of hand painting textures on landscapes you can define set of rules and have your landscape painted automatically. This is especially useful when dealing with vast terrains where where a lot of time has to be spent on painting. Instead of focusing on every inch of world, artist can use this approach and then focus on hand tweaking most important areas. While results are pleasant already, there is still much room for improvement. One can expand material with additional rules: grass blending? blending different textures based on height? Make sand accumulate accordingly to wind direction and speed? Only limit is your imagination.
Tutorial files:
You can also access project on GitHub.
Hi PawelM,
I am Noah Zuo from China, I read your blog and it is really cool. I want to translate it to Chinese. Can I have your permission please?
Cheers,
Noah
Hello!
That’s totally fine for you to localize our tutorials! Just include clear notice that original tutorial is available on this website. Also you can send us translated text saying some thing like „This article is also available in Chinese language” so we can link your website too.
Cheers,
Pawel
Dear PawelM,
Thank you very much for this fantastic tutorial. It really helped me out on my project as well as understanding material functions a lot more. Keep up the great work!
-Teagan
Hi PawelM,
What version of the UE4 is relevant for the project? I received several warnings when I tried to build the project in UE4 4.17 .
Thanks for your articles. You’re inspiring.